Templates:
The templates include the spine seam.
Sail Template
Sail Blueprint
Center Cross Reinforcement Template
(click link to open/download PDF)
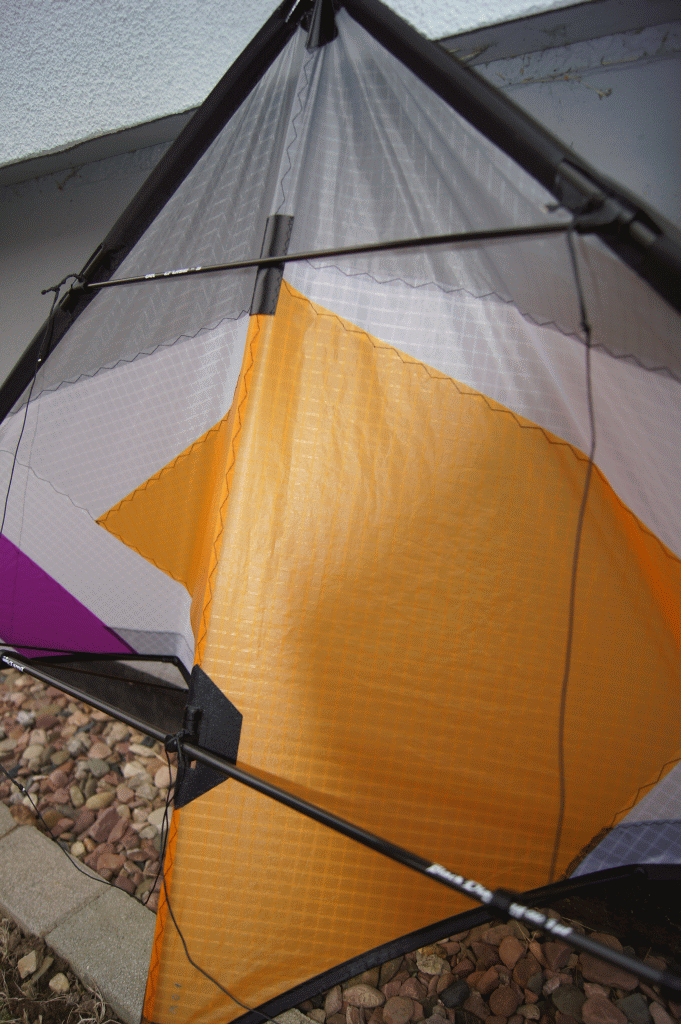
Photo’s:
Click on the thumbnails for larger version
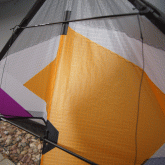
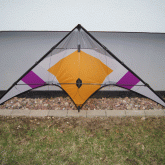
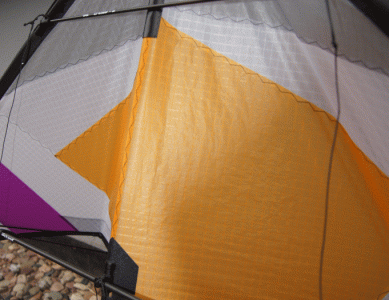
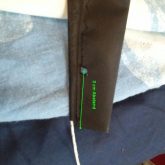
Detail photo’s of sail
Click on the thumbnails for larger version

Shopping list
Click here for the shopping list.
Building the Sail
Icarex Sail
Seamwidth: 6mm
Stitch: 3 step Zig-Zag
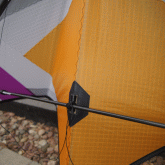
Stand-Off reinforcement
Material: Laminated Dacron
Size: 5cm wide
Stitch: Zig-Zag
Montage: The reinforcement can be cut using the kite template. Sew the sides of the reinforcement with the 3 step Zig-Zag stitch. The upper seam will be sewn with a normal Zig-Zag stitch.
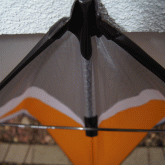
Tail reinforcement
Material: Dacron
Size: 5cm wide
Stitch: 3 step Zig-Zag
Montage: Shorten the end of the tail by 2,5 cm. Reinforce the tail with a 5 cm wide piece of dacron.
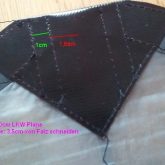
Upper Spreader reinforcement:
Material: Bisonyl (LKW-Plane)
Size: 2,5 cm x 7cm
Stitch: Zig-Zag
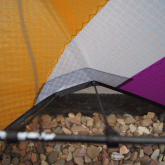
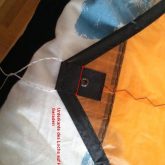
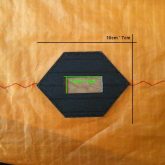
Center Cross reinforcement
Material: Laminated Dacron
Size: 7cm wide
(Center Cross Reinforcement Template)
Stitch: Zig-Zag
Montage: Fixate the reinforcement at 49 cm from the tip of the nose. The reinforcement will be fitted to the front and the back of the sail.
Trailing Edge seam
Material: Spinnakertape folded
Size: 2,5cm x 130cm (per side)
Stitch: Zig-Zag
Montage: Stick to sail with glue-stick (Pritt). Make sure the sail is completely fitted in the fold. Fixate with paper-clamps. Don`t forget to wash out the glue with warm water after sewing.
Leading Edges
Material: Dacron
Size: 5cm x 150cm (incl. 5cm fold at wingtip)
Stitch: Zig-Zag
Montage: Fold the dacron at the wingtip 5cm inwards and lay double. Cut a small piece at the end of the leading edge to avoid sewing the trailing edge with the leading edge. Fixate the dacron at the back of the sail with double sided cellotape.
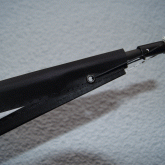
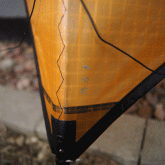
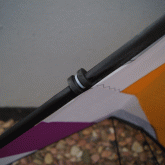
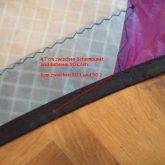
Nose
Material: Bisonyl (LKW-Plane)
Size: 10cm x 10cm
Stitch: Straight
Montage: Fold the Bisonyl (LKW-Plane) over the nose. The front remains as is. The point at the backside is cut off. Measured from the front 3,5 cm material remains. See detailphoto for the sewing pattern.
Cut Outs:
Upper Spreader: 18cm above Yoyo-Stopper hole (to 25cm above Yoyo-Stopper hole)
uQs: 27cm below Yoyo-Stopper hole (tot 34cm below Yoyo-Stopper hole)
Framing and bridle
Frame
Upper Leading Edge: 82,5cm SkyShark P200
Lower Leading Edge: 54,5cm SkyShark P200 (plus Ferrule: 8,4cm solid CFK)
Upper Spreader: 46,5cm 5mm CFK
Lower Spreader: 62cm SkyShark Black Diamond 5pt (Ferrule 9,6cm solid CFK)
Spine: 77,5cm SkyShark P200
Connector positions
Lower Spreader Connector: Glue a (c-clip) stopper to the end of the Lower Leading Edge. The APA will be on top of the stopper. The Bridle goes between the APA and the stopper.
Upper Spreader Connector: Top of Lower Spreader APA to bottom of Tiny-APA 50,5cm
Center Cross: 54cm from tip of nose to top of Level One-Center Cross
Stand-Offs
Inner: 22cm from Lower Spreader to Sail / Center of connector 23,5cm from side of Center Cross
Outer: 24cm from Lower Spreader to Sail / Center of connector 31cm from side of Center Cross
Tailweight
Splitnock incl. 17Gr solid Brass ferulle (6mm)
Bridle
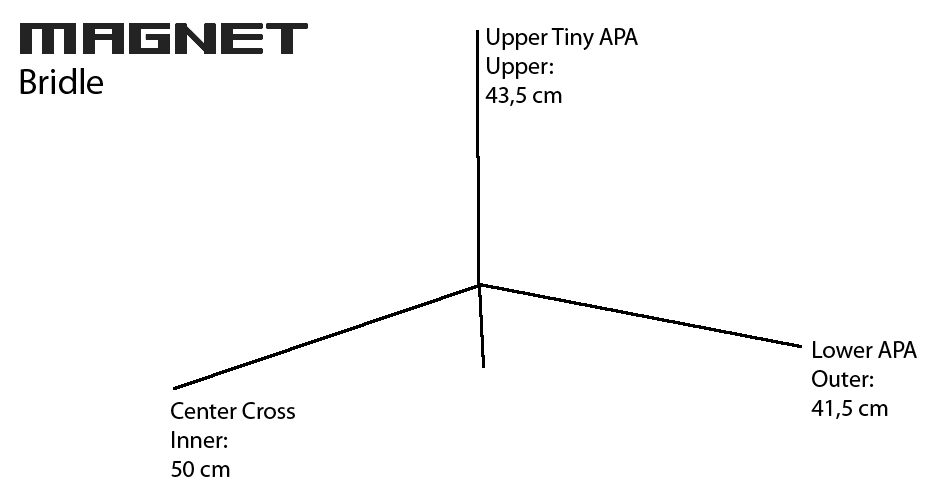
Upper: 43,5cm (knot above Tiny APA)
Inner: 50cm (knot above center cross)
Outer: 41,5cm (knot below APA)
Color Template:
Click on this link to open the colorizers page by Katzengrafik.
Tweaks/Mods
Sascha’s Bridle/Centre cross modification
I have a different bridle on my magnets. Feels so much more controllable. Inputs are a little bit larger. Here are the meassures of the bridle:
Upper: 49 cm
Lower: 44.5 cm
Inner to Center T: 57 cm
I did Put the Center t 2 cm towards the Nose (52 cm form tip of nose). And let the bridle on the old position spine. This makes the backflip even deeper and multilazies and cyniques easier. This is my personal preference.
Links
- Magnet plans in german (Zip file)
- Magnet review by Carlo de Rond on Kiteclique.com
- Building topic on Drachenforum.net
- Building topic on fracturedaxel.co.uk
- Building topic on gwtwforum.com
- Building topic on vliegerwereld.com
- Magnet topic on extremekites.com.au